Openstack developers can test the code developed by them using devstack and tempest before submitting the code for review. The devstack script gets the code from OpenStack github repo. However if developers have their own OpenStack developer repo and would like to test their code changes using tempest, some changes need to be done to the devstack configuration as well as tempest. This blog post describes the various steps required to test developer code available in their own github repo. This blog is relevant for new contributors to the OpenStack code and helps them understand the OpenStack devbuild and test steps.
1. Setting up the developer sandbox
The developer sandbox can be setup on a linux machine. If you already have a linux box, go to to step 2.
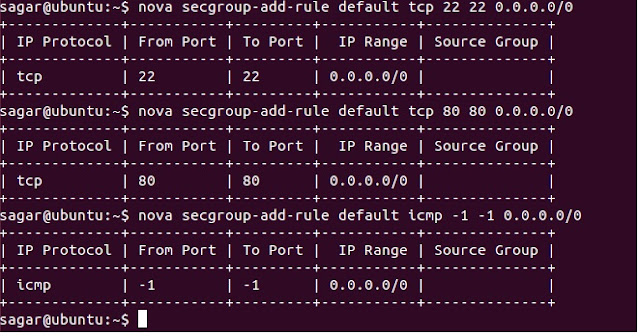
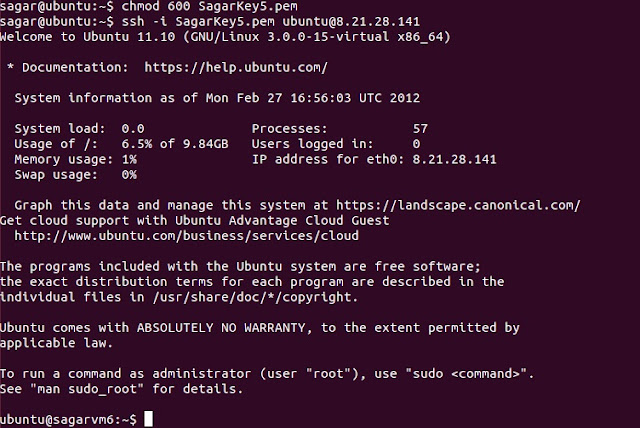
For a new developer who does not have a linux machine and would still like to build and test OpenStack, trystack.org is the solution. Ubuntu instances can be launched using trystack.org. Check my blog post on trystack.org and use the instructions mentioned and launch a Ubuntu instance. Once the instance is launched, SSH to that instance using putty.
2. Setting up devstack
First install git on your linux sandbox using the command
ubuntu@sagar-vm1:~$ sudo apt-get install git
Once git is installed, download devstack using the command
ubuntu@sagar-vm1:~$ git clone git://github.com/openstack-dev/devstack.git
Once devstack is downloaded, we need to run the script stack.sh available in the devstack directory. The script stack.sh downloads and builds the OpenStack code from the OpenStack github repo. If you have your own github repo which is forked from OpenStack repo and contains code modified by you, then we need to specify this repo so that the devstack script will download the code from your repo. This can be specified in the localrc file.
ubuntu@sagar-vm1:~$ cd devstack
ubuntu@sagar-vm1:~$ echo ADMIN_PASSWORD=password > localrc
ubuntu@sagar-vm1:~$ echo MYSQL_PASSWORD=password >> localrc
ubuntu@sagar-vm1:~$ echo RABBIT_PASSWORD=password >> localrc
ubuntu@sagar-vm1:~$ echo SERVICE_PASSWORD=password >> localrc
ubuntu@sagar-vm1:~$ echo SERVICE_TOKEN=tokentoken >> localrc
ubuntu@sagar-vm1:~$ echo FLAT_INTERFACE=br100 >> localrc
ubuntu@sagar-vm1:~$ echo API_RATE_LIMIT=False >> localrc
Now specify your own github OpenStack repo. If you dont have a repo, then ignore this step.
ubuntu@sagar-vm1:~$ echo NOVA_REPO=https://github.com/sagar/nova.git >> localrc
ubuntu@sagar-vm1:~$ echo NOVA_BRANCH=master >> localrc
Now execute stack.sh to setup OpenStack on your developer sandbox
ubuntu@sagar-vm1:~$ ./stack.sh
The script executes and install OpenStack. You should see the below mentioned statements once the script is executed successfully
Horizon is now available at http://8.21.28.12/
Keystone is serving at http://8.21.28.12:5000/v2.0/
Examples on using novaclient command line is in exercise.sh
The default users are: admin and demo
The password: password
This is your host ip: 8.21.28.12
stack.sh completed in 1073 seconds.
ubuntu@sagar-vm1:~/devstack$
3. Testing OpenStack with Tempest
Now that OpenStack is up and running on your linux box, we can test the installation by running tempest, the integration test suite for OpenStack components.
Let us get tempest from github tempest repo by executing the command
ubuntu@sagar-vm1:~$ git clone git://github.com/openstack/tempest
For tempest to run the API tests successfully, it needs configuration information which can be specified in a configuration file. Simplest way to create the conf file is to copy the sample conf file available with tempest and modify the contents of the file according to your setup
Execute the command to create a conf file
ubuntu@sagar-vm1:~/ cd tempest/
ubuntu@sagar-vm1:~/ cp etc/tempest.conf.sample etc/tempest.conf
Modify the tempest.conf to provide your setup specific details
First provide the host IP. This is the IP of your developer sandbox
# This is the main host address of the authentication service API
host = 127.0.0.1
Then provide the password of the user WITHOUT administrative privileges. Devstack creates 2 users, admin and demo. The demo user does not have administrative privelege.
# This should be the username of a user WITHOUT administrative privileges
username = demo
# The above non-administrative user's password
password = password
# The above non-administrative user's tenant name
tenant_name = demo
Tempest needs UUID of a image available in Glance (OpenStack Image component) . This can be got by executing the following command
glance -I admin -K password -T admin -N http://8.21.28.12:5000/v2.0 -S keystone index grep ami | cut -f1 | awk '{print $1}'
Replace the IP and password with your sandbox IP and the password you provided in localrc file.
The result of this command is something like this.
Arguments
ID
------------------------------------
1e06d0dc-2938-41ae-a47c-1581bde13c01
3cd67ffb-4e23-44ce-a568-089863425823
0fff1668-aa0d-4bcc-a27b-6fd33e3c1648
Now copy this image UUID and provide it in tempest.conf
# Reference data for tests. The ref and ref_alt should be
# distinct images/flavors.
image_ref = 1e06d0dc-2938-41ae-a47c-1581bde13c01
image_ref_alt =1e06d0dc-2938-41ae-a47c-1581bde13c01
flavor_ref = 1
flavor_ref_alt = 2
Next modify build_interval
# Number of seconds to wait while looping to check the status of an
# instance or volume that is building.
build_interval = 30
This sets the build interval to 30 secs. This is required since we are running the tests on a instance (VM) and devstack will use QEMU.
Also set resize_available to False.
# For resize to work with libvirt/kvm, one of the following must be true:
# Single node: allow_resize_to_same_host=True must be set in nova.conf
# Cluster: the 'nova' user must have scp access between cluster nodes
resize_available = False
Change the user name and password in [image] section of tempest.conf
[image]
# This section contains configuration options used when executing tests
# against the OpenStack Images API
# This should be the username of a user WITHOUT administrative privileges
username = demo
# The above non-administrative user's password
password = password
# The above non-administrative user's tenant name
tenant_name = demo
Finally provide the admin password in [compute-admin] section of tempest.conf
[compute-admin]
# This section contains configuration options for an administrative
# user of the Compute API. These options are used in tests that stress
# the admin-only parts of the Compute API
# This should be the username of a user WITH administrative privileges
username = admin
# The above administrative user's password
password = password
# The above administrative user's tenant name
tenant_name = admin
Once these changes are done, we are set to run tempest by executing the following command
ubuntu@sagar-vm1:~$ nosetests -v tempest
Once all the tests are completed, you should get the following message on your console
Ran 139 tests in 1330.624s
OK(SKIP = 6)
Note - When you run the tests, the number of tests might be more if more test cases have been committed to the tempest repo.
At the end of these steps you should be able to launch a developer sandbox, install OpenStack and test it using tempest.


